


How to Groom a Dog at Home Confidently and Safely

The secret to a successful home groom isn't about perfect trimming on day one; it's about creating a positive, low-stress routine. Start by choosing a dedicated grooming spot. A quiet corner in a bathroom or laundry room works perfectly. This tells your dog that grooming is a predictable, safe activity, not a random, scary event.
Setting Up Your At-Home Grooming Station
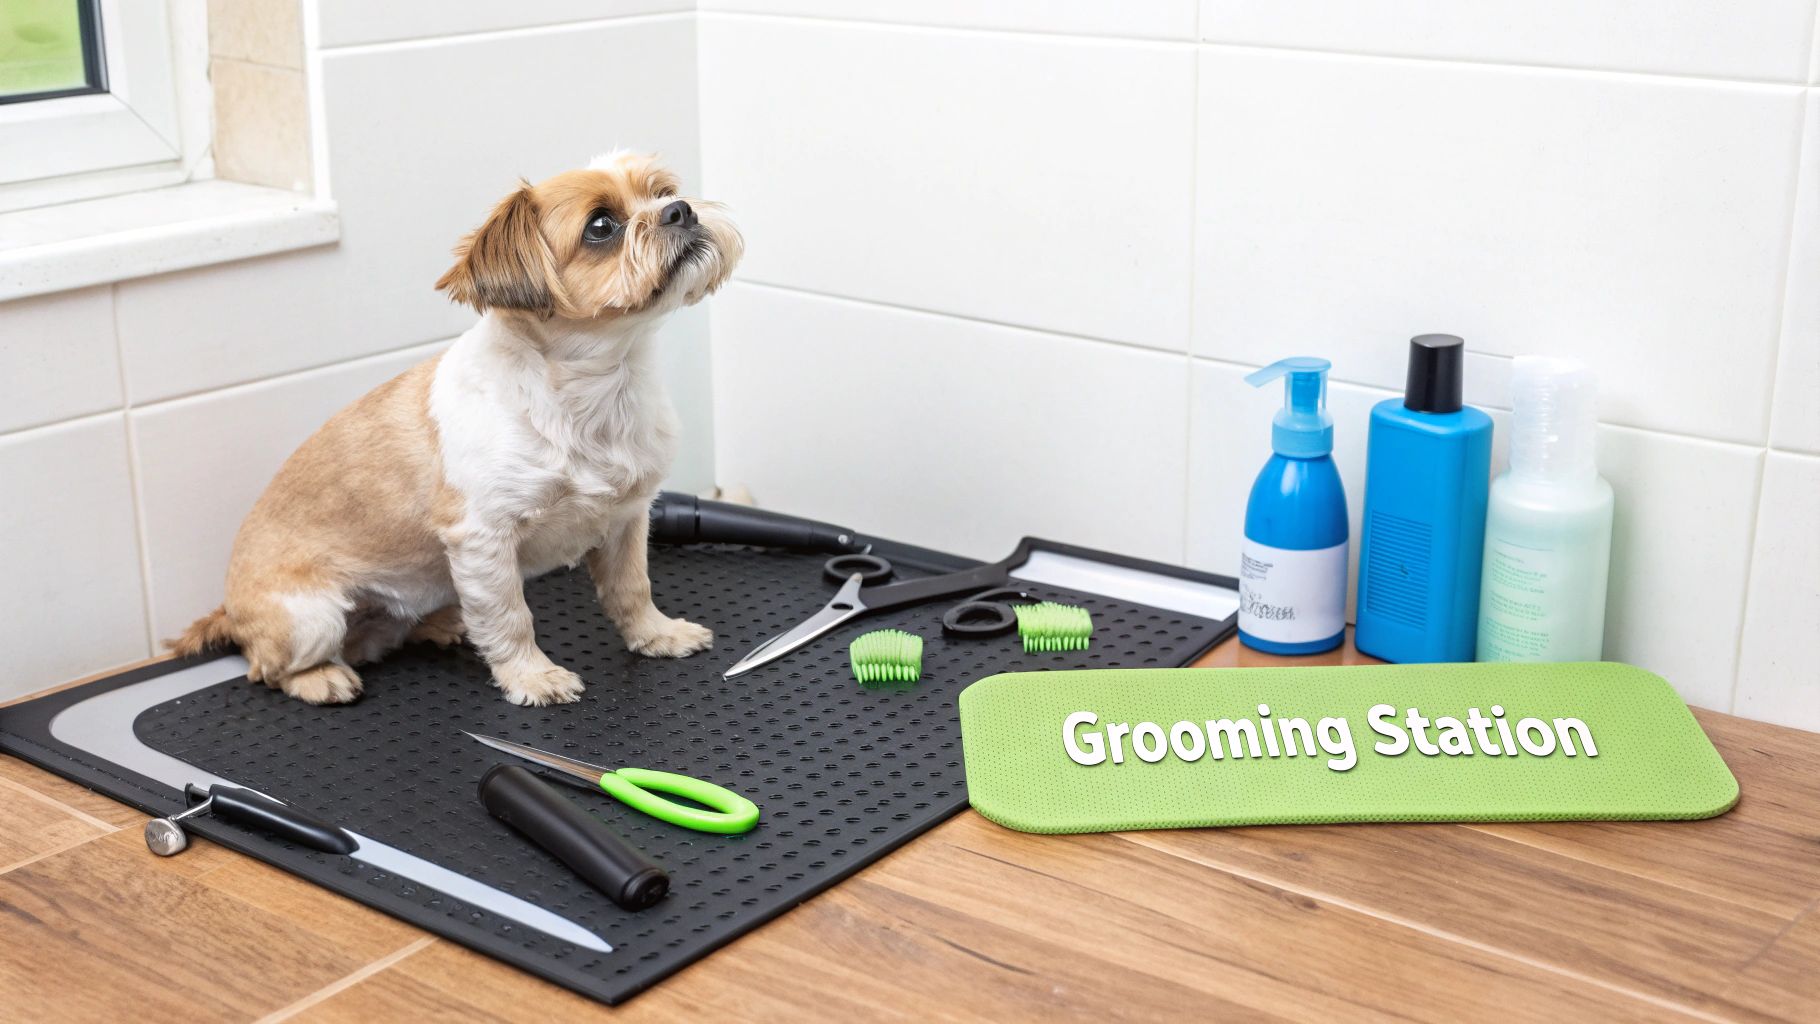
Your goal is a controlled environment where you both feel secure. First, lay down a non-slip mat. Slippery surfaces are a primary cause of anxiety and injury for dogs, whether you're grooming on a table or in a tub. Next, ensure the area is well-lit so you can see exactly what you're doing, especially when trimming nails or checking for skin issues hidden under the fur.
Choosing Your Essential Tools
Gather all your tools before you bring your dog to the station. Stopping mid-groom to find a comb will only increase your dog's anxiety. The tools you need depend on your dog's coat type. A slicker brush is essential for a Golden Retriever's dense coat but too harsh for a smooth-coated Beagle.
Equip your at-home grooming kit with these core items:
- Brushes and Combs: Select tools based on your dog’s coat. A slicker brush, a de-shedding tool, and a sturdy metal comb are a great foundation for most breeds.
- Dog-Specific Shampoo: Never use human shampoo. Its pH is incorrect for a dog’s skin and will cause irritation. Choose a gentle, tear-free formula made for pets.
- Nail Trimmers: Choose between scissor-style clippers or a grinder. A grinder is an excellent option for dogs sensitive to the "snap" of traditional clippers.
- Quality Towels: Have two or three absorbent towels ready to make drying faster and more efficient.
- High-Value Treats: Prepare a stash of special treats that your dog only gets during grooming sessions. This builds a powerful, positive association with the process.
Investing in quality tools pays off. Good shears cut cleanly without pulling hair, and a quiet nail grinder can prevent a struggle with a nervous pup. For help selecting the right equipment, Pet Magasin offers a practical guide to the best grooming tools for dogs.
Creating a Calm Atmosphere
Your dog mirrors your energy. If you are stressed, they will be too. Play some relaxing music, speak in a calm, soothing voice, and keep your initial sessions short. The goal of the first session isn't a perfect haircut; it's simply getting your dog comfortable with standing on the mat and letting you handle them.
Actionable Tip: The environment you create is as critical as the tools you use. Start with a calm, predictable grooming station with a non-slip surface to build a foundation for a safe and positive experience.
The at-home pet care market is expanding, with the global pet grooming industry projected to reach USD 42.86 billion by 2035. This growth is driven by owners seeking professional-grade products like organic and hypoallergenic shampoos, which are now widely available online, making it easier to meet your dog’s specific needs, especially for sensitive skin.
Mastering The Bath Without The Mess

A successful bath cleans your dog's coat without stripping natural oils, preventing skin irritation and reinforcing grooming as a positive experience. The first, non-negotiable step is a thorough brush-out before your dog gets wet. Water tightens mats and tangles, making them painful and sometimes impossible to remove. Brushing first removes loose fur and debris, allowing the shampoo to reach the skin and clean effectively.
Getting The Water And Shampoo Just Right
Once your dog is brushed, focus on the water temperature. Always use lukewarm water. What feels warm to you can be too hot for a dog's sensitive skin. Test it on the inside of your wrist; if it feels neutral, it’s perfect.
When applying shampoo, don't pour it directly onto your dog's back. This concentrates the product in one spot and makes it difficult to rinse out completely. Instead, work up a lather in your hands first or dilute the shampoo with water in a separate bottle. This technique ensures an even spread for a thorough clean.
For specific issues like fleas, it's worth finding a targeted product. You can learn more about the best flea shampoo for dogs to choose one that is both safe and effective.
Pro Tip: Before turning on the water, gently place a cotton ball in each of your dog's ears. This simple trick effectively keeps water out of the ear canal, helping to prevent common and painful ear infections, especially in breeds with floppy ears.
Rinsing And Drying For A Healthy Coat
The most common bathing mistake is insufficient rinsing. Leftover soap residue is a leading cause of post-bath itching and skin irritation. Rinse thoroughly. When you think you're done, rinse again. You should be able to run your hands through the coat and hear a "squeaky clean" sound with no slickness.
Drying is a critical final step, especially for dogs with long or double coats. Damp fur can lead to hot spots and other skin problems.
Effective Drying Methods
- Towel Drying: Begin by gently squeezing excess water from the coat. Use an absorbent microfiber towel to pat the dog dry. Avoid vigorous rubbing, which can create new tangles.
- Pet-Safe Dryer: For a fluffy, professional finish, use a pet dryer on the lowest heat and speed settings. Keep the nozzle moving several inches from their skin to prevent concentrating heat and causing burns.
Even with careful planning, messes can happen. For tips on cleanup, you can find helpful pet stain removal techniques to keep your home fresh. A properly dried dog is comfortable and ready for the next grooming step.
The Right Way to Brush and De-mat Your Dog
Regular brushing is the cornerstone of your home grooming routine. It does more than make your dog look good; it's your primary defense against painful mats, helps distribute natural skin oils, and provides an opportunity for a quick health check. This consistent maintenance prevents larger, more painful issues later.
To be effective, you must tailor your tools and technique to your dog's coat. A quick pass with a bristle brush might work for a short-haired Vizsla, but for a double-coated Husky, you need to get down to the skin.
Matching Your Brushing Strategy to Your Dog’s Coat
For dogs with a thick undercoat, such as German Shepherds or Samoyeds, the goal is to remove the soft, downy fur beneath the longer guard hairs. This is the fur that sheds and forms mats if neglected.
Use an undercoat rake or de-shedding tool and work slowly in sections, always moving in the direction of hair growth. A highly effective technique is line brushing: use one hand to part the hair in a line, then brush the fur down and away from that part. With each pass, you should see a clean line of skin, confirming you are not just skimming the top layer.
Effective brushing is also a key strategy to manage pet dander and allergies, helping to keep your home environment healthier for everyone.
How to Safely Tackle Tangles and Small Mats
Even with a consistent brushing schedule, you will encounter tangles, especially in high-friction areas like behind the ears, in the "armpits," and under the collar. The moment your brush snags, stop pulling.
Hold the base of the tangled hair firmly against the skin to prevent yanking. Then, use the end tooth of a sturdy metal comb to gently pick the knot apart, working from the outer tip of the hair inward toward the skin. A light mist of detangling spray can provide slip and make the process easier.
Crucial Tip: Never attempt to cut a mat out with scissors. A mat pulls the skin up into its base, making it shockingly easy to cut your dog. This is a common and completely avoidable injury seen by veterinarians.
The global pet grooming services market, estimated at USD 6.89 billion, is projected to hit USD 10.35 billion by 2030. This growth reflects the rise of at-home grooming, as owners seek affordable ways to bond with and care for their dogs.
Knowing When to Call in a Professional
An essential part of home grooming is recognizing your limits. Sometimes a mat is too severe to remove safely yourself. Acknowledging this is a sign of a responsible owner, not failure.
Call a professional groomer if you encounter any of these red flags:
- The Mat is Skin-Tight: If you cannot easily slide a comb between the mat and your dog's skin, it is too dangerous to remove at home.
- The Matting is Widespread: Large, felt-like mats covering significant areas of the body (known as "pelting") require a professional shave-down.
- Your Dog is in Pain: If your dog yelps, cries, or tries to bite when you touch the area, stop immediately.
- The Skin Looks Inflamed: Mats can trap moisture and bacteria, leading to infections that require veterinary attention.
Attempting to remove severe matting can cause extreme pain and serious injury. A professional groomer has the tools and experience to shave the mat off safely and humanely, which is the kindest option.
A Beginner's Guide to Clipping and Trimming
Using clippers for the first time can feel intimidating, but it's a completely achievable skill for any dog owner. The key is to break the process down into small, confident steps, prioritizing your dog's safety and comfort over achieving a perfect haircut. A successful first trim is one that creates a positive experience for both of you.
The rise in at-home care is a significant trend, with the U.S. pet grooming and boarding industry projected to reach USD 15.5 billion. This growth is fueled by more owners investing in their pets' care, including purchasing tools for home grooming. You can find more data on the growing pet grooming industry on ibisworld.com.
Selecting the Right Clippers and Guards
Your most important step is choosing the right tool. For home use, a quiet, cordless clipper model is ideal, as the loud buzzing and vibration of heavy-duty clippers often frighten dogs.
Equally important are the comb guards. These plastic attachments snap onto the blade and are your best safety net, ensuring you leave a consistent length of fur and preventing you from cutting too short or nicking the skin.
- Longer Guards (e.g., 1 inch): Start with a longer guard if you're a beginner. It will remove bulk without a drastic change, allowing you to get comfortable with the clippers.
- Shorter Guards (e.g., 1/4 inch): Use these for a cleaner look on the body. Proceed with caution, as a shorter cut can reveal skin imperfections.
- No Guard: This is for experts only. A bare blade is extremely sharp and should only be used on specific areas like paw pads once you are highly confident in your technique.
This visual guide shows the prep work that simplifies clipping.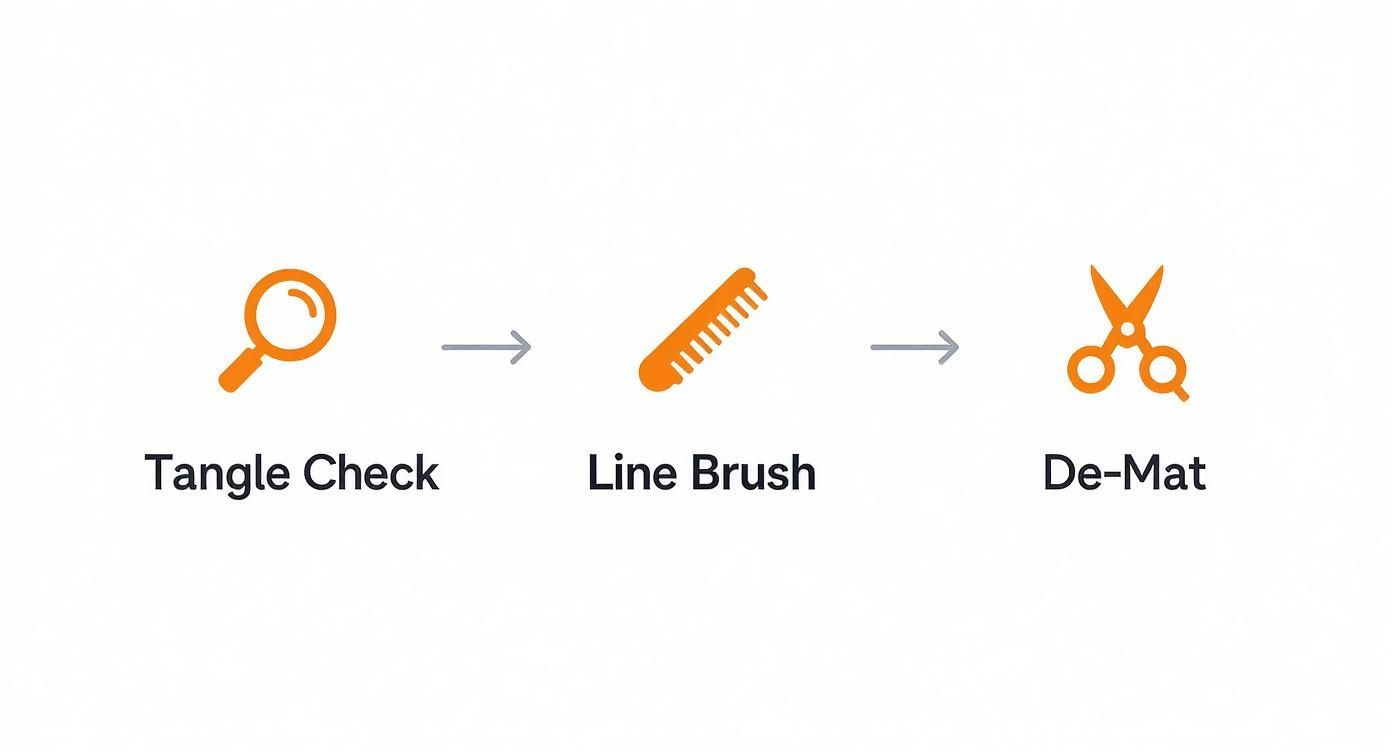
As it illustrates, a good groom always begins with addressing tangles before moving on to deeper brushing and clipping.
Mastering Safe Clipping Techniques
Technique is everything. Always move the clippers smoothly in the same direction the hair grows ("with the grain"). Going against the grain results in a much shorter, often choppy cut and increases the risk of skin irritation.
Hold the clippers flat against your dog's body and let the guard do the work. Do not press down. Use a light, gliding motion. For a dog new to clippers, start with a brief session on an easy area, like their back, offering plenty of praise and treats.
Crucial Safety Tip: Clipper blades get hot quickly. Every few minutes, stop and touch the blade with the back of your hand. If it feels warm to you, it's too hot for your dog's skin. Let it cool or swap it for a fresh blade before continuing.
Trimming Sensitive Areas with Care
Certain areas require extra caution. Tackle these spots only when both you and your dog are feeling relaxed.
- Around the Eyes: Never use clippers here. Use small, blunt-nosed scissors. Always point the scissors away from the eye and use a comb to lift the hair before snipping.
- Paws and Paw Pads: Carefully trim the hair between the paw pads using a small clipper with a #10 blade or blunt-nosed scissors. This improves traction and prevents matting.
- Sanitary Areas: To maintain cleanliness, keep the hair around the groin and rear end short. Use a gentle touch and a shorter guard, pulling the skin taut to create a flat surface.
Learning to groom your dog at home is a process. Your first attempt may not look professional, and that’s perfectly fine. With each session, your confidence and skill will grow, strengthening the bond with your best friend.
Essential Nail, Ear, and Dental Care Routines
A complete groom goes beyond a shiny coat to include clean ears, trimmed nails, and good dental health—details that are crucial for your dog's overall comfort and well-being. Mastering these tasks at home not only keeps your dog healthy but also allows you to spot potential issues like ear infections or dental problems early. With patience and the right technique, these tasks can become a normal part of your routine.
Mastering the Nail Trim
Overgrown nails can alter a dog's gait, causing paw pain and even long-term joint problems. Aim to trim their nails every three to four weeks. The key is to make it a calm, routine event.
Whether using clippers or a grinder, your first step is to locate the quick—the bundle of blood vessels and nerves inside the nail. In light-colored nails, you can see it as a pinkish area. In dark nails, you'll need to work more carefully.
Tips for a Safe and Confident Nail Trim
- Take It Slow: Always trim off tiny slivers at a time. After each small clip on a dark nail, look at the cut surface. As you near the quick, a small, dark oval will appear in the center. Stop when you see it.
- Keep Styptic Powder on Hand: Even professionals occasionally nick the quick. If it happens, stay calm. Press a pinch of styptic powder onto the nail tip to stop the bleeding quickly. Your calm reaction will show your dog it’s not a big deal.
- Break It Up: You don't have to trim all four paws in one session. Trim one paw, then reward your dog with a high-value treat and a break. For more help choosing a tool, see our guide on the best dog nail cutter for your needs.
Keeping Ears Clean and Healthy
A dog's ear canal, particularly in floppy-eared breeds, is a warm, moist environment where yeast and bacteria can thrive. Check their ears weekly to prevent painful infections. Lift the ear flap and look inside. A healthy ear is pale pink, mostly clean, and has no strong odor. A small amount of light brown wax is normal.
To clean, apply a vet-approved ear cleaning solution to a cotton ball or gauze. Never use a cotton swab, which can push debris deeper. Gently wipe the visible parts of the outer ear. Do not probe into the ear canal; just clean what you can easily see.
Important Note: If you suspect an ear infection (indicated by head shaking, scratching, redness, or a foul odor), do not clean the ear. Contact your veterinarian immediately, as cleaning an infected ear can worsen the condition.
Simple Steps for Better Dental Hygiene
Over 80% of dogs show signs of dental disease by age three. Brushing your dog's teeth is the most effective way to combat the plaque that leads to gum disease and other health issues. Make it a quick, positive part of your daily routine.
- Introduce the Toothpaste: Let your dog lick a small amount of dog-specific toothpaste off your finger. Never use human toothpaste, as it contains ingredients toxic to dogs.
- Practice the Motion: Once your dog accepts the toothpaste, gently rub your finger with paste along their outer gumline. Focus only on the outside surfaces of the teeth, where most plaque accumulates.
- Introduce the Brush: After a few days, switch to a dog toothbrush or a soft finger brush. Use small, circular motions and keep the session short, ending with praise or a toy.
If daily brushing isn't feasible, supplement with dental chews and toys. The chewing action helps scrape plaque off their teeth, improving oral health and freshening their breath.
Knowing When to Call a Professional Groomer
Grooming your dog at home is an excellent way to bond and monitor their health. However, being a responsible owner means knowing when to seek professional help. Recognizing when a task is beyond your skill level is the smartest and kindest decision for your pet.
Some grooming challenges are too risky for a DIY approach and can lead to pain or injury. A professional groomer has the training, tools, and experience to handle difficult situations safely, turning a stressful ordeal into a routine procedure for your dog.
Red Flags That Signal It's Time for a Pro
While daily brushing and regular baths are manageable at home, certain situations require professional intervention. If you encounter any of the following, put down the tools and call a groomer.
- Severe Matting: If a mat is so tight you cannot easily slide a comb between it and the skin, stop. Do not try to cut it out with scissors. This condition, known as "pelting," pulls the skin into the knot, creating a high risk of a deep, painful cut.
- Behavioral Challenges: If your dog becomes extremely anxious, growls, or snaps when you bring out grooming tools, it is unsafe to proceed. A professional groomer is trained in handling nervous dogs and can complete the job with minimal stress.
- Signs of Skin Issues: If you notice a rash, bald patches, open sores, fleas, or ticks during grooming, your session is over. While a groomer can assist with cleanup, your first call should be to your vet to diagnose and treat the underlying problem.
A good groomer operates under a simple rule: humanity over vanity. Their primary concern is your dog's comfort and safety, even if it means a very short "puppy cut" is necessary to remove painful mats.
Finding a Qualified Groomer
Not all groomers are the same. Look for a professional who maintains a calm, clean, and safe facility. Ask these questions before booking an appointment.
Key Questions to Ask a Potential Groomer
| Question Category | Specific Questions to Ask | Why It's Important |
|---|---|---|
| Experience & Safety | "Are you certified?" "What is your process for anxious dogs?" | This confirms their professional standards and commitment to humane handling. |
| Process | "Do you use cage dryers?" "How long will my dog be with you?" | This clarifies their daily procedures so you can ensure you are comfortable with them. |
| Transparency | "May I see your grooming area?" "Can I see any client reviews?" | A reputable groomer will be proud to show you their clean workspace and share positive feedback. |
View at-home and professional grooming as a team effort. The maintenance you perform between appointments—such as regular brushing to prevent mats and handling exercises for paws and ears—makes the groomer's job easier. This partnership is the key to keeping your dog looking and feeling their best year-round.
For all your at-home maintenance needs, from durable brushes to gentle shampoos, trust Pet Magasin to provide high-quality, affordable tools designed with your pet's comfort in mind. Explore our full range of grooming supplies at https://www.petmagasin.com.

Leave a comment