
Dog Nail Clipping Guide: A Safe How-To for Pet Owners

You're kneeling on the kitchen floor with a pair of clippers in your hand. Your dog already knows something is up. One paw gets tucked under the chest, the other gets offered for a second and pulled back, and your brain goes straight to the worst outcome: what if you cut too far and hurt them?
That hesitation is normal. Most nervous owners aren't squeamish about the clipper itself. They're worried about betraying their dog's trust. Nail trims feel high-stakes because dogs don't sit still like a mannequin, dark nails hide the quick, and one bad experience can make the next session harder.
The good news is that safe nail care is learnable. You don't need a groomer's speed. You need a calm setup, a steady method, and a way to stop before you get into trouble. That's what this dog nail clipping guide is built for.
Why Clipping Your Dog's Nails Feels So Stressful
A lot of owners freeze at the exact same moment. The dog is close, the clipper is open, the nail is lined up, and then the question lands hard: “Am I about to cause pain?” That pause is often worse with black nails because you can't rely on the easy pink visual you get with clear nails.
That fear isn't a sign you can't do this. It's a sign you care. In practice, the safest nail trims usually come from owners who move slowly, pay attention, and stop when the dog says they're uncomfortable.
The fear is usually about trust
Dogs feel vulnerable when someone handles their feet. Owners feel vulnerable because they know the quick is sensitive. Put those together and even a simple trim can feel loaded. The sound of the clipper, the pressure on the toe, and the memory of a past bad trim can all add tension before the first cut.
Some of the best first sessions end with only one or two nails trimmed. That still counts as progress.
If you're starting from scratch, it helps to look at nail care as part of overall paw maintenance, not an isolated chore. Resources like ChowPow's guide to paw health can give useful context on why healthy paws matter beyond appearance. For broader at-home basics, these beginner dog grooming tips are a solid companion read.
Confidence comes from a repeatable routine
What doesn't work is rushing because the nails look long. What does work is making each session predictable. Same spot. Same tools. Same calm handling. Same reward after each paw or each nail, depending on what your dog can handle that day.
A nervous dog doesn't need perfection from you. They need consistency and clear signals that nothing scary is about to happen.
Gathering Your Tools and Setting the Scene
Before you touch a paw, set yourself up so you won't have to improvise mid-trim. That's where many home sessions go sideways. Owners start with clippers but forget a non-slip surface, don't have anything ready in case of bleeding, or choose a time when the dog is already overstimulated.

Pick the tool that matches the nail
The two clipper styles most owners see are guillotine-style clippers and scissor-style clippers. Both can work, but they don't feel the same in your hand and they don't handle every nail equally well.
| Tool | Best use | Trade-off |
|---|---|---|
| Guillotine-style clippers | Small to medium dogs, thinner nails | Can feel less stable on thick nails |
| Scissor-style clippers | Larger dogs, thicker nails | Bulkier for tiny feet |
| Nail grinder | Smoothing edges, cautious owners, dogs that do better with gradual shaping | Noise and vibration can bother some dogs |
Scissor-style clippers tend to give many beginners better control because you can see both blades and line them up more clearly. Guillotine clippers can be fine on smaller nails, but once nails get thick or curved, a lot of owners find them harder to position accurately.
A nail grinder is useful if your dog hates the snap of clippers or if you want to round off sharp edges after clipping. It's not automatically easier, though. Some dogs dislike the hum or the vibration against the nail.
Keep your safety items within reach
A good setup is simple:
- Clippers or grinder: Choose one tool for the actual trim and keep a backup only if you know how to use it.
- Styptic powder: This is your first-aid item if you nick the quick.
- Treats: Use something your dog really values, not a bland everyday biscuit.
- Towel or mat: A stable surface helps the dog feel less slippery and keeps nail pieces contained.
If you're still deciding on the basic tool, this guide to choosing a dog nail cutter can help you narrow it down by size and handling style.
Practical rule: Set out every item before you bring your dog over. Once you start, you want both hands and your attention on the dog.
Timing matters more than people think
One of the easiest ways to make clipping smoother is to do it after a bath. According to Canine Works on timing a pawdicure, dog nails are softer when wet, which makes them easier to cut, and the loud snapping sound of clippers is dampened. That matters because the sound itself can trigger anxiety in many dogs.
This is one of those small changes that often has an outsized effect on the mood of the session. Softer nails cut more cleanly. A quieter clip feels less dramatic. The whole task becomes less loaded.
Build a calm environment, not a wrestling match
Use a place with steady footing and decent light. Hard, slippery floors make many dogs brace and pull away. A towel, bath mat, or grooming mat gives them traction and helps them feel secure. Keep the room quiet. Skip the crowded family audience.
If your dog is uneasy with foot handling, don't begin with clipping. Begin with touching a shoulder, sliding your hand down the leg, holding the paw for a second, and then rewarding. The goal isn't to “get it done no matter what.” The goal is to teach your dog that paw handling predicts nothing bad.
The Safe Clipping Technique for Any Nail
Your dog lets you hold the paw, you line up the clipper, and then your stomach drops right before the cut. That moment is where people rush, hesitate, or take off too much. The safest trim comes from a repeatable method, especially on dark nails where color is not much help.

How to hold the paw without making your dog resist
Support the paw with enough control to prevent twisting, but not so much pressure that your dog fights the hold. I aim to steady the leg at the joint above the paw and isolate the toe I am trimming between my fingers. That keeps the nail still and keeps fur clear of the blade.
Some dogs do better if you extend the toe slightly. Others resist the second they feel their toes spread. Adjust to the dog in front of you. If tension builds, trim one nail, reward, and pause before asking for the next.
The angle that gives the cleanest cut
Set the clipper so the cut follows the natural slope of the nail, usually around a 45-degree angle relative to the floor. That leaves a smoother edge and lowers the chance of crushing or splitting the tip.
Straight-across cuts can leave a flatter, blunter end that contacts the floor sooner. On thick or curved nails, that can also tempt you to take too much at once. A modest angle gives you better control.
Light nails and dark nails need different strategies
On light nails, the quick usually shows as a pink core inside the nail. Use that visual guide, but do not clip right up to it. Leave a small margin and take another tiny trim next session if needed.
Dark nails need a slower approach. Take off very small slivers and study the fresh cut surface after each clip. As you get closer to the quick, the center of the nail changes. It often looks less chalky and more dense, with a darker center appearing before you are too close. That is your signal to stop.
Curved nails deserve extra caution because the quick often follows the curve farther than owners expect.
The squeeze test for dark nails
This is the method I rely on most with black nails, and it helps nervous owners more than any visual tip. Before you make the cut, place the clipper where you plan to trim and gently close the handles just enough to apply pressure without cutting. I call this the squeeze test.
If the spot is safely beyond the quick, many dogs stay relaxed. If you are too close, dogs often give you information before the blade finishes the cut. They may pull the paw back, tense the leg, turn to look, lick suddenly, or show a sharp jump in concern. Stop there and move farther toward the tip.
The squeeze test is not magic, and it is not a substitute for tiny clips. Some very stoic dogs give little reaction, and some sensitive dogs react to handling alone. Used together with small trims and close inspection of the nail, it gives you another safety check that most owners never get taught.
With dark nails, ask whether the next tiny clip is clearly safe. If the answer is uncertain, stop.
That mindset prevents a lot of accidental quicks.
A simple working sequence
Use the same sequence on every nail so your hands stay calm and your dog gets a predictable routine:
- Position the dog comfortably: Standing, side-lying, or tucked against your body all work if the dog feels stable.
- Take one paw only: Keep the job small and readable.
- Isolate one nail: Hold the toe steady and clear away fur.
- Set your angle: Follow the natural slope of the nail.
- Trim a tiny amount: Use the visible quick on light nails. Use sliver cuts on dark nails.
- Check the cut surface: Reassess after every clip.
- Use the squeeze test if needed: Especially on black nails when you are deciding whether to take one more sliver.
- Reward and release: A brief pause helps many dogs reset before the next nail.
A visual demonstration can help if you're trying to match hand position and pacing:
What works and what usually doesn't
A few choices make nail trims easier right away.
- What works: steady handling, good light, tiny clips, and stopping before your dog gets overwhelmed
- What causes mistakes: cutting a long curved nail as if it were hollow at the tip, twisting the toe, or taking a “final” big clip because the nail still looks long
- What helps with dark nails: the squeeze test, reading the cut surface after each trim, and accepting that some nails need several sessions
- What usually backfires: trying to finish every foot in one go after the dog has started resisting
If your dog stiffens, pants, jerks the paw away, or stops taking treats, that is useful information. End the session there. A safe partial trim is better than one bad cut that makes the next session harder.
What to Do If You Cut the Quick
Even careful people occasionally nick the quick. It happens in clinics, grooming salons, and living rooms. The important part is how you respond in the next few moments.
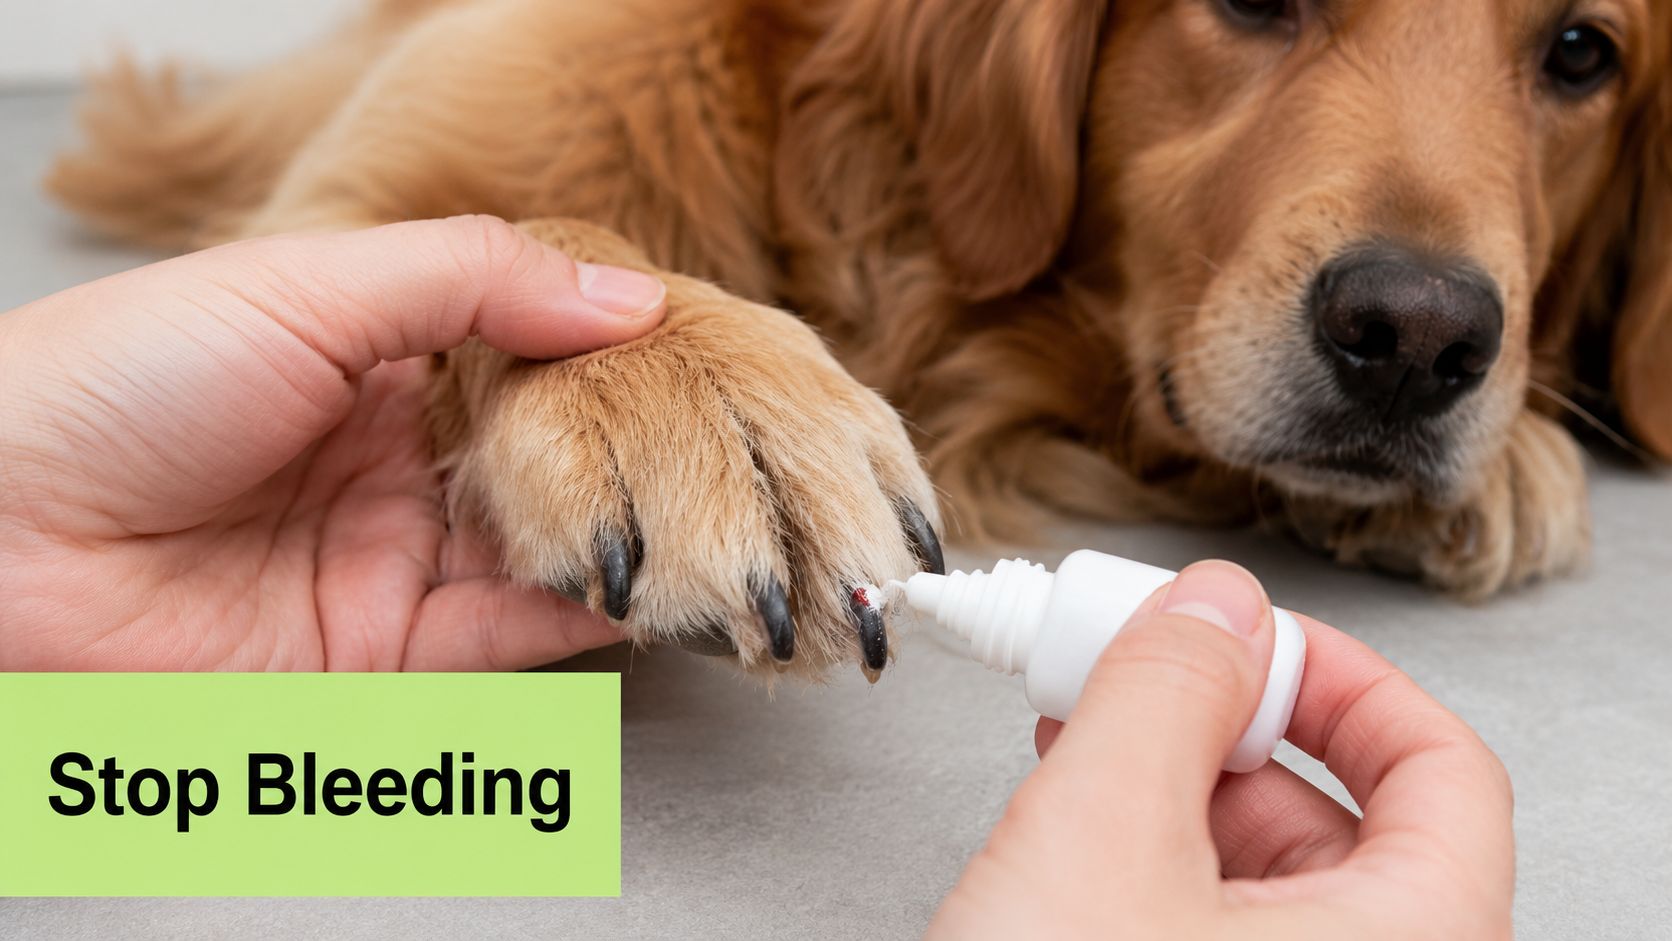
Step one, stop your own panic first
Dogs react to your energy fast. If you gasp, rush, or fumble, your dog usually becomes more alarmed than they were from the nail itself. Put the clipper down. Hold the paw if your dog will tolerate it, and speak normally.
This is also where prevention pays off. A clean 45-degree angle helps maintain nail structure and reduces splitting or cracking, which is why that positioning matters so much in the first place, as noted earlier from Chewy's clipping guidance.
Step two, stop the bleeding
Apply styptic powder directly to the bleeding tip with firm pressure. If you don't have styptic powder, flour or cornstarch can be used to help control bleeding. Keep pressure steady for a short period instead of repeatedly checking and restarting the bleed.
Stay still longer than you think you need to. Repeatedly lifting your hand to inspect the nail can disturb the clot.
If your dog is struggling, use the least amount of restraint needed to help them through the moment. Then stop the trim. Don't try to “make up for it” by rushing through the remaining nails.
Step three, end the session kindly
Once the bleeding is controlled, give your dog a high-value treat and let the session be over. Watch the paw afterward and keep the environment calm. Most dogs recover emotionally much faster if the event isn't followed by more handling.
A quick cut feels awful in the moment, but it doesn't have to define the next trim. What matters is that the dog learns the scary part stopped, you helped, and then things got better.
Alternatives and Long-Term Nail Care
Some dogs do better with a different tool. Some owners do too. The right method is the one you can use calmly and repeat before the nails get long enough to change how your dog stands or walks.

Clippers versus grinders
Clippers are quicker. Grinders are slower, but they remove nail in small passes, which gives nervous owners more control. If you struggle with dark nails, that slower pace can help, especially if you pair it with the squeeze test from earlier instead of relying on sight alone.
That extra control has a cost. Some dogs dislike the sound, some react to the vibration, and a grinder can warm the nail if it stays in one spot too long. Use short touches and give the nail a moment to cool between passes.
Here's the practical comparison:
| Method | Best for | Main downside |
|---|---|---|
| Clippers | Fast trims, clear cuts, dogs that stay settled for handling | Less margin for error if you take off too much |
| Grinders | Gradual shortening, dark nails, smoothing sharp edges | Noise, vibration, and slower sessions |
A mixed approach often works best. Clip to remove bulk, then grind the edge smooth. Or skip clippers altogether if your dog accepts the grinder better.
Why frequency matters
Nails stay easier to manage when you trim a little before they become a problem. For many dogs, that means checking them every couple of weeks and trimming as needed rather than waiting for a full overgrowth situation.
A simple home test works well. If you hear nails clicking on hard floors, they are usually overdue. If your dog starts slipping, shifting weight backward, or resisting paw handling more than usual, look at nail length before you assume it is just behavior.
Shorter, regular sessions also help the quick recede over time. That matters with overgrown nails and with black nails, where safe progress often comes from tiny trims done consistently.
What regular care actually looks like
Long-term success usually looks boring, and that is a good thing.
Use a routine your dog can predict. Same spot, same rewards, same order. Many dogs handle nail care better when you trim two or three nails, stop while they are still coping well, and come back later.
A practical maintenance routine looks like this:
- Touch and hold paws between trim days so handling does not only happen during clipping.
- Trim one paw or even one nail if that is all your dog can do calmly.
- Check dark nails with the squeeze test each time, especially after taking off a small slice.
- Reward during the session, not only after the last nail.
- Keep the tool you are using consistent until your dog is comfortable with it.
If you want the rest of your home care routine to feel this manageable, this guide on how to groom your dog at home is a helpful next step.
When to call in help
Some dogs need a professional plan. If your dog panics, twists hard enough to risk injury, has severely curled nails, or has a history that makes foot handling difficult, bring in a groomer or your veterinary team.
That is good judgment, not failure.
A professional can shorten overgrown nails in stages, show you how your dog responds to different restraint and tool options, and help you decide whether home maintenance is realistic right now. Keep practicing gentle paw handling between appointments so every nail session does not feel like a surprise.
Becoming Your Dog's Favorite Nail Tech
The people who settle into a good nail routine are usually the ones who stay calm, work in small steps, and quit while the dog is still coping well. Skill matters, but predictability matters more. A dog that knows what your hands, tools, and pace will feel like is much easier to trim safely.
Good habits are what make you reliable to your dog. On light nails, leave a small buffer in front of the visible quick and angle the cut to match the natural shape of the nail. On dark nails, take thin slices and check the tip after each one. The visual signs help, but they are not enough on their own. The squeeze test is often what keeps anxious owners out of trouble. After a small trim, gently press the sides of the nail near the tip. If the nail still feels soft or your dog pulls back, stop there for now. If it feels firm and your dog stays relaxed, you can usually take another tiny amount.
That step is easy to skip. It is also one of the safest ways to work on black nails without guessing.
Progress beats perfection
Your dog does not need a show-ring finish. Your dog needs regular care that stays boring, safe, and manageable. One calm nail today still counts, especially if it helps your dog trust the process next time.
Trust is built in patterns. Use the same mat or towel, bring out the same clippers or grinder, keep styptic powder within reach, and end before your dog feels trapped. Dogs remember how a session felt long after they forget how many nails you finished.
If you want the rest of your home routine to feel this practical, this guide on how to groom your dog at home is a useful next read.
Pet Magasin makes everyday pet care easier with thoughtfully designed essentials for families who want practical, reliable gear. If you are ready to build your home grooming kit with dependable clippers, grinders, and styptic powder, explore Pet Magasin for products that support safe, comfortable nail care.

Leave a comment